Difference between revisions of "RUL2"
TomekLecocq (talk | contribs) m (→A. iLive's Reader - Texture Viewer: Replace missing imageshack images (recovered from archive.org)) |
TomekLecocq (talk | contribs) (Replace all other missing imageshack images (recovered from archive.org).) |
||
| Line 76: | Line 76: | ||
So, lets see how this works. It's a little different, when SC4Tool loads, use the Tool selection screen and choose Texture Creator. | So, lets see how this works. It's a little different, when SC4Tool loads, use the Tool selection screen and choose Texture Creator. | ||
| − | + | [[Image:Texturecreator1lm1.jpg]] | |
When the Texture Viewer loads you will then have to click the Folder icon which allows you to browse and open the file in which the texture is in. | When the Texture Viewer loads you will then have to click the Folder icon which allows you to browse and open the file in which the texture is in. | ||
| − | + | [[Image:Texturecreator2ho8.jpg]] | |
When the file has been loaded you will see a long list of folders with numbers next to them. These numbers are the IIDs of the texture set. By selecting one of the folders it will show you all 5 zoom levels of the corresponding texture. As shown, it will tell you some information about the texture in the right and it will also preview the texture in 0 position. | When the file has been loaded you will see a long list of folders with numbers next to them. These numbers are the IIDs of the texture set. By selecting one of the folders it will show you all 5 zoom levels of the corresponding texture. As shown, it will tell you some information about the texture in the right and it will also preview the texture in 0 position. | ||
| − | + | [[Image:Texturecreator3yp9.jpg]] | |
===Rotation Determining=== | ===Rotation Determining=== | ||
| Line 92: | Line 92: | ||
To start, there are 8 total positions of a texture, the 4 rotations (0, 1, 2, and 3), then there is the mirror of the texture (mirroring will be explained later below). The next four pictures show the T-Intersection for Asphalt Streets made by [[People:Hableurg|Hableurg]] in its four rotations. | To start, there are 8 total positions of a texture, the 4 rotations (0, 1, 2, and 3), then there is the mirror of the texture (mirroring will be explained later below). The next four pictures show the T-Intersection for Asphalt Streets made by [[People:Hableurg|Hableurg]] in its four rotations. | ||
| − | + | <div><ul> | |
| − | + | <li style="display: inline-block;"> [[Image:Tintersection0nx6.jpg|frame|none|Rotation 0]] </li> | |
| − | + | <li style="display: inline-block;"> [[Image:Tintersection1re2.jpg|frame|none|Rotation 1]] </li> | |
| − | + | <li style="display: inline-block;"> [[Image:Tintersection2yp9.jpg|frame|none|Rotation 2]] </li> | |
| − | + | <li style="display: inline-block;"> [[Image:Tintersection3xd8.jpg|frame|none|Rotation 3]] </li> | |
| − | + | </ul></div> | |
| − | |||
| − | |||
| − | |||
| − | |||
| − | |||
| − | |||
| − | |||
| − | |||
| − | |||
The rotation of a texture happens in a clockwise progression in 90 degree increments. | The rotation of a texture happens in a clockwise progression in 90 degree increments. | ||
| Line 118: | Line 109: | ||
Obviously for this there will be multiple variations, but let's start with the Straight Piece on the left and the T-Intersection on the right. | Obviously for this there will be multiple variations, but let's start with the Straight Piece on the left and the T-Intersection on the right. | ||
| − | + | [[Image:Straight1ni0.jpg]] [[Image:Tintersection2yp9.jpg]] | |
As shown above this is the result we are looking for. But how do we get here? Well, we must look at each texture individually. Let's start with the T-Intersection first. If we look at the previous section we will notice that the 0 position of the T-Intersection is facing the opposite direction. Now, visually in your mind take the 0 position and rotate it in 90 degree increments clockwise until it is in the position you want. | As shown above this is the result we are looking for. But how do we get here? Well, we must look at each texture individually. Let's start with the T-Intersection first. If we look at the previous section we will notice that the 0 position of the T-Intersection is facing the opposite direction. Now, visually in your mind take the 0 position and rotate it in 90 degree increments clockwise until it is in the position you want. | ||
| − | + | [[Image:Tintersection0nx6.jpg|frame|none|Rotation 0]] | |
| − | |||
| − | |||
| − | |||
| − | |||
| − | |||
| − | |||
| − | + | [[Image:Tintersection1re2.jpg|frame|none|Rotation 1]] | |
| − | + | [[Image:Tintersection2yp9.jpg|frame|none|Rotation 2]] | |
As you can see, to match the resultant we want, we must rotate the texture 180 degrees. This will give us rotation #2. So, this means that the Straight Piece will be next to a T-Intersection in Rotation #2. We are half way there. We now must determine the rotation of the Straight Piece. Use iLive's Reader Texture Viewer and look for the Street Straight Piece to find out what the 0 position is. | As you can see, to match the resultant we want, we must rotate the texture 180 degrees. This will give us rotation #2. So, this means that the Straight Piece will be next to a T-Intersection in Rotation #2. We are half way there. We now must determine the rotation of the Straight Piece. Use iLive's Reader Texture Viewer and look for the Street Straight Piece to find out what the 0 position is. | ||
| − | + | [[Image:Straight0in9.jpg]] | |
You will find that the 0 position the Straight Piece runs up and down. As shown above. So, what rotation(s) will the Straight Piece line up with the T-Intersection in Rotation position #2? Rotate the Straight Piece 90 degrees clockwise 3 times and find out. | You will find that the 0 position the Straight Piece runs up and down. As shown above. So, what rotation(s) will the Straight Piece line up with the T-Intersection in Rotation position #2? Rotate the Straight Piece 90 degrees clockwise 3 times and find out. | ||
| Line 146: | Line 131: | ||
*Straight Piece, Rotation 3 beside T-Intersection, Rotation 2. | *Straight Piece, Rotation 3 beside T-Intersection, Rotation 2. | ||
| − | Now you know how to determine texture rotations. Let's try some small exercises. The answers are " | + | Now you know how to determine texture rotations. Let's try some small exercises. The answers are hidden, just click on "show answer" to uncover the answer. |
| − | |||
| − | |||
| − | |||
| − | |||
| − | + | {| role="presentation" class="wikitable" | |
| + | | [[Image:Straight1ni0.jpg]] [[Image:90turn1ge1.jpg]] | ||
| + | |- | ||
| + | | <div class="mw-collapsible mw-collapsed" data-expandtext="Show answer" data-collapsetext="Hide answer">Straight Piece, Rotation 1 beside 90 Turn, Rotation 1</div> | ||
| + | |} | ||
| − | + | {| role="presentation" class="wikitable" | |
| + | | [[Image:90turn3fa6.jpg]] [[Image:Tintersection3xd8.jpg]] | ||
| + | |- | ||
| + | | <div class="mw-collapsible mw-collapsed" data-expandtext="Show answer" data-collapsetext="Hide answer">90 Turn, Rotation 3 beside T-Intersection, Rotation 3</div> | ||
| + | |} | ||
| − | + | {| role="presentation" class="wikitable" | |
| + | | [[Image:Tintersection1re2.jpg]] [[Image:90turn2hg4.jpg]] | ||
| + | |- | ||
| + | | <div class="mw-collapsible mw-collapsed" data-expandtext="Show answer" data-collapsetext="Hide answer">T-Intersection, Rotation 1 beside 90 Turn, Rotation 2</div> | ||
| + | |} | ||
| − | |||
===Mirror Determining=== | ===Mirror Determining=== | ||
Latest revision as of 02:53, 19 February 2021
| TGI Info | |
|---|---|
| Name | Override RUL |
| Format | RUL File |
| Type
Group Instance |
0x0A5BCF4B
0xAA5BCF57 0x10000002 |
| Comments | |
| See also: RuleOverrides RUL | |
RUL 0x10000002, also known as the Override RUL and RUL2 is used to override textures and models for the transit networks. Basically, it defines what happens when a texture or model is drawn next to another texture or model. It is essential for the NAM draggable networks such as GLR, RHW, SAM and HSRP.
This RUL is used to fix bugs and replace intersections/junctions and/or set-ups for whatever reason. It is also used to enforce, and/or follow on from, a set of rules from another RUL File to enhance a junction. One such example of this is the Avenue-to-Highway Transition. Note that this RUL can make impossible junctions possible, but doing so may require quite the number of rules.
Format
RUL 0x10000002 is probably the simplest RUL File in format, but hardest to grasp in practice. This file has one large section, titled RuleOverrides. It works by saying that if two textures or models are aligned next to each other like this:
If Texture1 is next to Texture2 is True,
Then Texture3 replaces Texture1 and Texture4 replaces Texture2
The file is further broken into subsections by way of comments that describe the lines, and essentially contains a long series of command lines. The format of the lines in this file is:
ID1,Rot1,Flip1,ID2,Rot2,Flip2=ID3,Rot3,Flip3,ID4,Rot4,Flip4
Where:
- ID1 = Instance ID of the left tile.
- ID2 = Instance ID of the right tile.
- ID3 = Instance ID which replaces the left tile.
- ID4 = Instance ID which replaces the right tile.
- Rot_ = Rotation of the texture, values are 0, 1, 2, or 3.
- Flip_ = The flip, or mirror, of the texture. Values are either 0=not mirrored or 1=mirrored.
Graphically,
The Instance IDs of the textures can reference either a FSH or Exemplar file. Rotation goes clockwise from 0 to 3. If flip=1, then rotation goes counterclockwise. The flip property is not often used, but it is used with textures like the 90 Degree Turn Transition Piece from Street to Road.
These particular rules are very powerful, since one line makes them work in all four cardinal orientations. The left/right perspective is not set in stone to a cardinal direction. Rather, the right side of Tile1 has to border the left side of Tile2.
Also, having zeros in the ID1a and ID2a spots causes a bad draw (red line). This is to keep things from being constructed which don't look right, but still conform to all the other RULs.
An example line from this file is:
Textures 1 and 2 are the original side by side textures you want to override, and Textures 3 and 4 are the new textures you want to replace the old ones with. Texture 3 replaces Texture 1, and Texture 4 replaces Texture 2.
A Guide to Texture Overrides
This is an intermediate skill level tutorial that is intended to help those wanting to learn how to edit RUL 0x10000002. In this tutorial you will learn the very basics of transit modding. This includes determining how to make an override of a side by side texture setup, determining what rotations do, how mirroring works, etc. It is recommended that you are understanding of how to use SC4Tool's Texture Creator, iLive's Reader Texture Viewer and the basic functions of iLive's Reader.
Finding Textures
This section will explain how to find textures, their IIDs and their 0 position. You will be using iLive’s Reader and SC4Tool in this section.
A. iLive's Reader - Texture Viewer
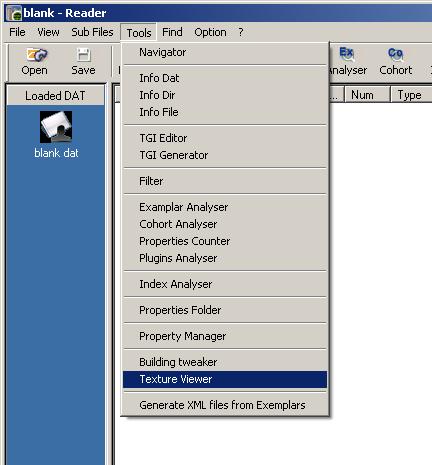
Let's start by learning about some of the basic uses of iLive's Reader in Transit Modding. Probably one of the most important skills is learning how to use the Texture Viewer. It is very simple to use. To open go to Tools -> Texture Viewer as shown below:
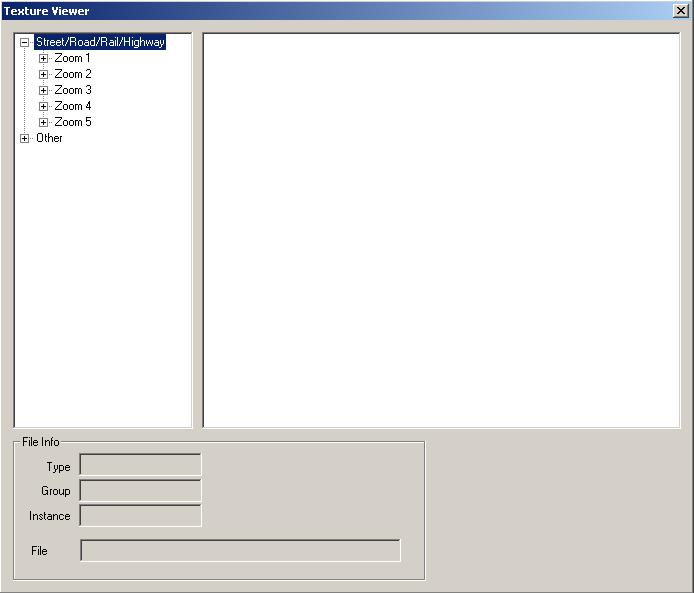
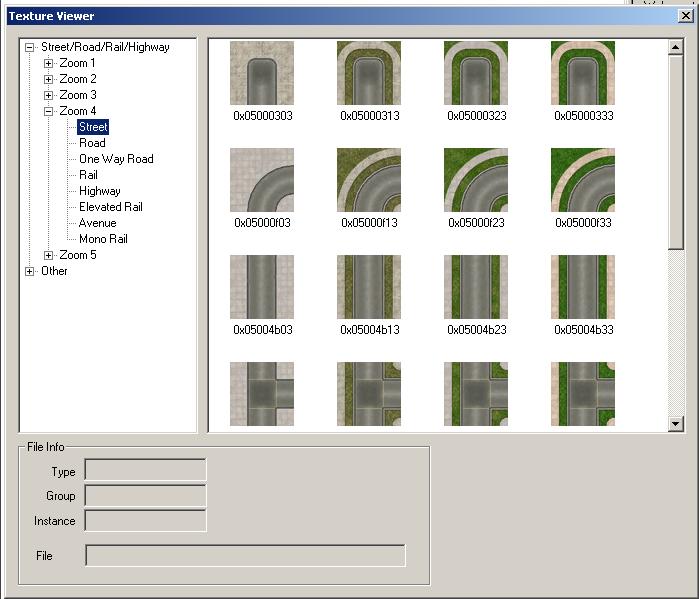
Texture Viewer has two main sections: Transit Textures, and Other Textures. The only limit to the Texture Viewer is that is only shows the textures from the SimCity_#.dat files in your MAXIS\Sim City 4\ folder. You will notice when you select the first section, Street/Road/Rail/Highway, the 5 zoom levels will show up and you will have to choose one of the following zooms to view the textures. It is recommended to choose Zooms 4 or 5 because they are the easiest to see.
Once you choose your zoom you will have textures show up in the right area. These will be all the textures for a given network. You will notice on the left under you zoom level that all the Networks have been shown (Street, Road, OWR, etc.). For this tutorial, let's go with the easiest one: Streets. Streets have the fewest number of textures because any major intersections are found under the network that the Street is intersecting with, and that there are no diagonals.
Now, Texture Viewer shows all the textures in 0 position. We will get to that later. But, the Texture Viewer is good for 2 things, finding a texture and its IID, and finding which position the game considers 0 position. Also, it shows all 4 wealth levels of the texture.
B. SC4Tool - Texture Creator
Now, iLive's Reader is great for finding textures created by Maxis, but what if you are looking for a texture that has been added later in NAM or SAM or RHW? Well, this is where SC4Tool is handy.
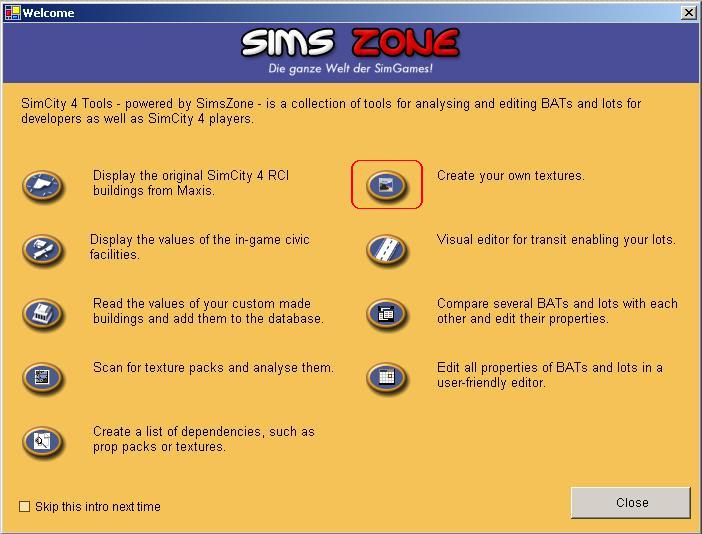
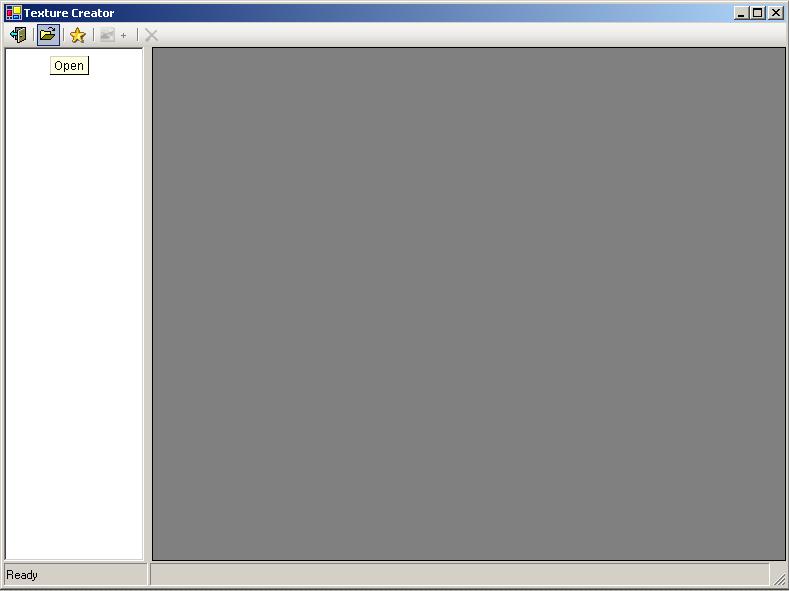
So, lets see how this works. It's a little different, when SC4Tool loads, use the Tool selection screen and choose Texture Creator.
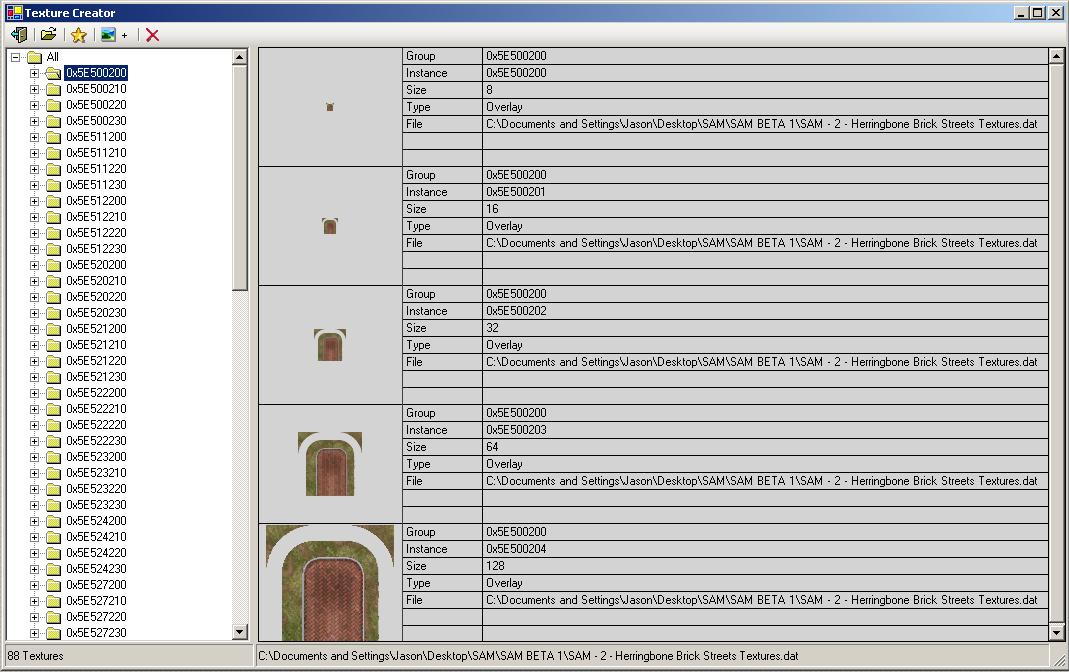
When the Texture Viewer loads you will then have to click the Folder icon which allows you to browse and open the file in which the texture is in.
When the file has been loaded you will see a long list of folders with numbers next to them. These numbers are the IIDs of the texture set. By selecting one of the folders it will show you all 5 zoom levels of the corresponding texture. As shown, it will tell you some information about the texture in the right and it will also preview the texture in 0 position.
Rotation Determining
This section will explain how to determine the rotation of a texture. This is a critical part of writing RULs because if you have the rotations wrong the override will either not work or it will show up improperly. Determining the rotation is fairly simple, but sometimes it is hard when trying to figure things out when the textures are side by side.
A. Rotation of a single texture
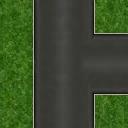
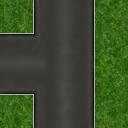
To start, there are 8 total positions of a texture, the 4 rotations (0, 1, 2, and 3), then there is the mirror of the texture (mirroring will be explained later below). The next four pictures show the T-Intersection for Asphalt Streets made by Hableurg in its four rotations.
The rotation of a texture happens in a clockwise progression in 90 degree increments.
B. Side by Side Textures
Now we are going to start getting into the juicy stuff. Side by side textures are how RUL 0x10000002 works. This has to be shown, it is close to impossible to explain. This will involve one example with a few small exercises.
Example: We are dragging a straight street into a street that is perpendicular making a T-Intersection. Now, instead of the original Maxis textures, we are writing an override RUL for a SAM texture set.
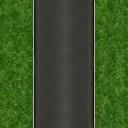
Obviously for this there will be multiple variations, but let's start with the Straight Piece on the left and the T-Intersection on the right.
As shown above this is the result we are looking for. But how do we get here? Well, we must look at each texture individually. Let's start with the T-Intersection first. If we look at the previous section we will notice that the 0 position of the T-Intersection is facing the opposite direction. Now, visually in your mind take the 0 position and rotate it in 90 degree increments clockwise until it is in the position you want.
As you can see, to match the resultant we want, we must rotate the texture 180 degrees. This will give us rotation #2. So, this means that the Straight Piece will be next to a T-Intersection in Rotation #2. We are half way there. We now must determine the rotation of the Straight Piece. Use iLive's Reader Texture Viewer and look for the Street Straight Piece to find out what the 0 position is.
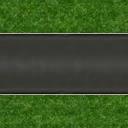
You will find that the 0 position the Straight Piece runs up and down. As shown above. So, what rotation(s) will the Straight Piece line up with the T-Intersection in Rotation position #2? Rotate the Straight Piece 90 degrees clockwise 3 times and find out.
You will find that when the texture is rotated 90 and 270 degrees it will fit the result shown in the original example. This means Rotations 1 and 3 both work. Which one do we choose? We choose both and write the code for both to get all variations of the intersection.
So, your results are:
- Straight Piece, Rotation 1 beside T-Intersection, Rotation 2, and
- Straight Piece, Rotation 3 beside T-Intersection, Rotation 2.
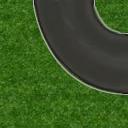
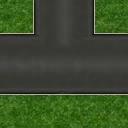
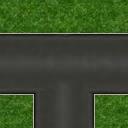
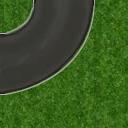
Now you know how to determine texture rotations. Let's try some small exercises. The answers are hidden, just click on "show answer" to uncover the answer.
 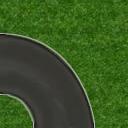
|
Straight Piece, Rotation 1 beside 90 Turn, Rotation 1
|
|
90 Turn, Rotation 3 beside T-Intersection, Rotation 3
|
|
T-Intersection, Rotation 1 beside 90 Turn, Rotation 2
|
Mirror Determining
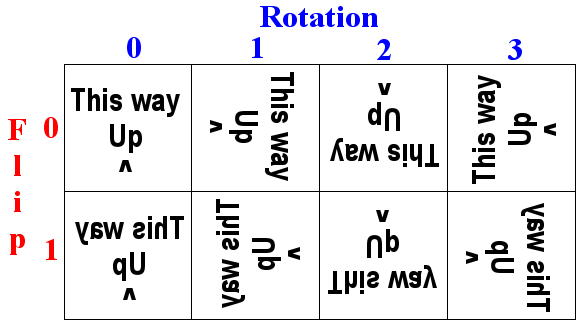
Determining the orientation of a texture when it is mirrored and rotated is best summed up with a simple chart:
There are two useful ways to determine the orientation of a flipped texture:
- First apply the rotation, then a horizontal mirror, or
- Mirror the texture horizontally and rotate the result counter-clockwise instead of the usual clockwise.
Use whichever is more intuitive for you.
Coding RUL 0x10000002
This is how we tell the game to make a certain texture beside another turn into two new side by side textures. The coding uses the format explained at the top of this page. Let's go with something we are already familiar with, turning the Maxis Straight Piece next to the Maxis T-Intersection into the SAM Asphalt textures of the same.
So, for this example:
First step, find the IIDs of the textures and their 0 positions:
MAXIS Straight Street = 0x05004b00
MAXIS T-Intersection Street = 0x05005700

SAM Asphalt Straight Street = 0x5e54b700
SAM Asphalt T-Intersection Street = 0x5e557700
Second, find out the Rotations you will need for all 4 pieces:
MAXIS Straight Street = 1 or 3
MAXIS T-Intersection Street = 2

SAM Asphalt Straight Street = 1 or 3
SAM Asphalt T-Intersection Street = 2
Will there be any mirrors? Not for this case.
Write the code for each texture:
MAXIS Straight Street = 0x05004b00,1,0     or     0x05004b00,3,0
MAXIS T-Intersection Street = 0x05005700,2,0

SAM Asphalt Straight Street = 0x5e54b700,1,0     or     0x5e54b700,3,0
SAM Asphalt T-Intersection Street = 0x5e557700,2,0
Next you have to place these bits of code into the appropriate positions in the line:
- Which texture should be Texture 1? MAXIS Straight Street
- Which texture should be Texture 2? MAXIS T-Intersection Street
- Which texture should be Texture 3? SAM Straight Street
- Which texture should be Texture 4? SAM T-Intersection Street
So, now you have all the information to write the whole line of code. Now, when you put it together you will have 2 variations of the ways this intersection can be formed:
- Maxis Straight Street in Rotation #1:
0x05004b00,1,0,0x05005700,2,0=0x5e54b700,1,0,0x5e557700,2,0
- Maxis Straight Street in Rotation #3:
0x05004b00,3,0,0x05005700,2,0=0x5e54b700,3,0,0x5e557700,2,0
Please, use this information carefully and if you plan to make any modifications, contact members of the NAM Team for approval and help.
Subway Overrides
Subway overrides are slightly different to the normal texture overrides described above, but hopefully the text below will explain. Compared to other networks, not much is known about the subway network, and there can be some odd glitches/problems.
Instance IDs
Models
The first 2 digits of subway model IIDs must always be 07, we have no idea why Maxis decided this, but we guess it is fixed in the EXE.
The IIDs follow the same pattern as road IIDs: The straight road section IID is 0x00004b00, so the straight subway section IID is 0x07004b00.
Paths
Crazily, Maxis decided that the subway paths should not have the same IID as the model. All subway paths must always start with 06.
The straight subway section model IID is 0x07004b00, so the path IID for that tile is 0x06004b00.
RUL 0x10000002 Coding
The RULs for subway overrides use exactly the same format as normal RULs, as described in the Format section above. However, the IIDs are represented differently than for the other networks. To determine the correct IID format, you must remove the 07 and any 0s following it that are not after another number, also it must not be shorter than 4 characters.
To turn the IID 0x07004b00 into a Subway RUL IID:
- Remove the 07 to get 004b00.
- Next, remove the 0s at the beginning to get 4b00.
Examples
For a subway piece with an IID of 0x07004b00, the resulting RUL2 code would be:
0x4b00,0,0,0x4b00,0,0=0x########,0,0,0x########,0,0
For a subway piece with an IID of 0x07020700, the resulting RUL2 code would be:
0x20700,0,0,0x20700,0,0=0x########,0,0,0x########,0,0
For a subway piece with an IID of 0x07000300, the resulting RUL2 code would be:
0x0300,0,0,0x0300,0,00x#########,0,0,0x########,0,0


